They make us think about the good times. They renew a sense of belonging. They provide a feeling of family pride, and of a long and rich family history. Traditions renew the spirit of giving.
One tradition my family has enjoyed as long as I can remember, is baking cookies. It is one of many fun things I did as a boy. After 66 years, I am still doing it with my two grandsons.

Monday, December 31, 2012
Sunday, December 30, 2012
Snowshoeing Techniques - Part 10

Etiquette
(Part 10 of 10)
- Xcountry skiers work hard to make their tracks. So when breaking trail, you encounter a Xcountry track, either step over it or break trail along side.
- Skiers have the right-of-way. It's easier for a snowshoer to step and change direction than a skier.
- When with a group, remain single file, and use the leaders prints.
- Always be polite and respect other outdoor enthusiasts.
- When back at the TH, nordic center, or resort, remove your snowshoes, cinch them together cleat to cleat, and hang them on a rack provided, or out of the way of people traffic.
- Poles should be fully collapsed and cinched to your pack or hung with your snowshoes until you are ready to leave.
Saturday, December 29, 2012
Snowshoeing Techniques - Part 9
Safety
(Part 9 of 10)
- Stay on established trails.
- Keep within your physical abilities.
- Do not snowshoe alone.
- Take breaks, don't get overheated
- Stay dry
- Use common sense when deciding how best to reach a hilltop or maneuver through a stand of trees or exposed rocks.
- Be familiar with signs of hypothermia. Keep head, hands, and feet warm. That is where you loose heat the quickest.
- Before leaving for the TH, let someone know where you are going and when you expect to return.
Friday, December 28, 2012
Snowshoeing Techniques - Part 8
Breaking Trail/Stride:
(Part 8 of 10)
- If you go with friends (recommended) always take turns leading in virgin snow.
- Those who are more energetic should go first as long as it is practical and safe.
- A few minutes breaking trail for each leader is enough.
- In deep snow your steps will be shorter and your lift higher.
- The leader must consider the pace of the slowest member of the group.
- The leader must make their steps short enough so everyone can follow in them.
- Those following should use the leaders footsteps to conserve energy plus it keeps a well defined trail.
- Take plenty of breaks to rehydrate, adjust bindings, and rest.
- If the leader encounters a Xcountry track, step over it or break trail for snowshoers along side.
- Do not step on a Xcountry track, or be labeled the back country bully.
- Keep your stride and gait comfortable as you move.
Thursday, December 27, 2012
Snowshoeing Techniques - Part 7
Powder and Ice:
(Part 7 of 10)
- The deeper the powder the shorter your steps will be.
- You will use more energy in deep powder because you will be lifting each snowshoe higher.
- Take it slow and take breaks...speed is not an issue.
- If you encounter ice or a hard crust on top of snow, stop and survey the terrain. If there is an easy way around the condition, take it. If not, and you have a pair or crampons or yax trax in your pack, use them.
Wednesday, December 26, 2012
Snowshoeing Techniques - Part 6
Poles
(Part 6 of 10)
On flat terrain, consider using poles as an option. My recommendation, if you decide not to use them strap them to your pack anyway. You won't regret it.
- Adjustable hiking poles are best. To convert them from summer hiking use to snowshoeing, simply add a snow basket to the bottom of each pole. Most manufacturers design a threaded area into the bottom of each post, directly above the tip, to allow you to twist a snow basket into place.
- Baskets come in various diameters. Larger baskets will cover more area when the pole is planted in snow, keeping you from sinking too deep in powder. I keep more than one diameter basket on hand.
- Pole length should provide for your forearm to be at a 90-degree angle while standing on flat terrain. To get the proper pole length, flip each pole upside down. With your forearm at a 90-degree angle, hold one pole under the basket and adjust it as required for the proper length. Same with pole two.
- Shorten poles when ascending a slope, lengthen them when descending a slope.
- When traversing, one pole can be lengthened the other shortened as needed.
- Hands should be fed thru the pole straps from the bottom up. Then grab the finger grips. The strap will fall naturally over the top of your hand. This allows you to rest your hands when needed. Straps will still be around your hand providing a quick easy recovery.
Tuesday, December 25, 2012
Snowshoeing Techniques - Part 5
Descending:
(Part 5 of 10)
- When coming down slope, as you step put your weight on the back part of the snowshoe so the heel cleat provides traction.
- In soft powder, you can go straight down the slope because you will be able to dig your heels in easier.
- Similar to side-stepping on an ascent (see part3), to come down slope, put weight on the upside edge of your snowshoe. Again, be sure your steps are far enough apart that they do not collapse on each other.
Monday, December 24, 2012
Snowshoeing Techniques - Part 4
Traversing and Switchbacking:
(Part 4 of 10)
Traversing and creating a switchback are ways you can ascend a slope rather than taking a direct line to the top. This method is best used when snow is hard or has a crust on top.
- Kick in the front edge of each snowshoe as you climb at an angle.
- If a trail includes switchbacks up a slope, first assess if there is a better way. Making your own angled switchbacks may prove better for you. If not, follow the switchbacks provided.
- Your poles should be adjusted shorter on the uphill side longer on the downhill side.
- When you change switchback direction, exchange poles from hand to hand as you move up slope.
- Remember, snowshoes have cleats to give you traction so you can move around trees, rock formations, and questionable frozen streams with confidence.
Sunday, December 23, 2012
Note on Part 3 of 10
Not sure what occurred but part 3 got posted before parts 1 and 2 for some reason. You can find part 3 posted on December 19th below. Scroll down, it's there. Sorry!
Saturday, December 22, 2012
Snowshoeing Techniques - Part 2
Stamping and Edging:
(Part 2 of 10)
- Stand in place. Step out touching the heel first then the toe to the snow before applying your weight to that foot. This is stamping.
- The technique is used when breaking trail (see part 8).
- Edging is when you plant the edge of your snowshoe into the snow then apply weight to the outside edge making a step.
- This technique is used when climbing a slope by ascending sideways.
Friday, December 21, 2012
Snowshoeing Techniques - Part 1
First Steps:
(Part 1 of 10 parts)
At the end of the day, you want time spent outdoors to be enjoyable. Keep a few things in mind as you are introduced to this new adventure.
- Begin on a flat path, or open space with packed snow.
- Keep a natural stride and gait just like walking.
- If you scrape the opposite snowshoe, widen the gap a bit.
- If you have difficulty with balance, use poles (see part 6).
- Swing arms naturally - right foot/left arm, left foot/right arm, just like walking.
- On flat terrain, roll over onto your front, bring one knee up while pushing with your arms to a half kneeling position. Then to a standing position. Use your poles for support.
- Grab the hand of a buddy or a tree branch to pull yourself up.
- Remove pack, position it beside you (uphill), roll over onto your front then push off with your arms.
- On descents, take your hands out of the straps, and place poles beside you. Roll over to get your knees under you facing into the slope. Use poles as a brace while coming to a standing position. .
- Walk in a circle if space and conditions permit.
- "Step Turn"; Lift one snowshoe placing it at a 90-degree angle in front of the other snowshoe forming a "T." Do it again for a full turn.
- "Kick Turn"; Lift one snowshoe placing it a full 180-degrees and beside the other snowshoe. Bring the trailing snowshoe along side. Use this method in tight places.
Thursday, December 20, 2012
Introducing the Snowshoe Technique Series

Starting tomorrow, for the next ten days, this series will inform you of the things to keep in mind as you begin learning the fundamentals of snowshoeing. It's as easy as saying "If you can walk, you can snowshoe." The learning curve is short. There is no huge investment for special boots or clothing. You don't need to get a lift ticket or stand in line to do what you want to do.
This series is written with those who have not been on snowshoes before in mind. To those who consider themselves skilled shoers, you to may find something in this series you forgot or were not aware of. So check it out either way.
After this series, I will break down each of my top ten snowshoe hikes (right side of the home page) including directions to the TH, level of difficulty, skill level, elevation, map needed and contact information.
Lets go have some fun!
Wednesday, December 19, 2012
Snowshoeing Techniques - Part 3
Ascending:
(Part 3 of 10)
Going up a grade and across hills requires some skill.
- Stepping or Stepping-up (easy/moderate slopes): Face directly uphill and make the first step into the snow with some weight on your toes as you secure the front claws into the slope.Follow with the trailing snowshoe securing the claws comfortably above the first.
- Herringbone stepping (moderate slopes): Face uphill with snowshoes facing out at a 45-degree angle. Place your weight on the outside of each snowshoe as you climb to maintain traction.
- Scrambling (moderate slopes): This is an aggressive method of stepping in a fast paced pattern. Keep weight on your toes for traction.
- Side stepping (steep slopes): Turn your body sideways to the slope and take sideward steps up grade. With your lead snowshoe, step to the up side of the hill making a shelf in the snow. Bring the trailing snowshoe to the step your other snowshoe just vacated.
- Kick Stepping (Deep snow and steep mountains): Facing the slope, kick the toe of one snowshoe into the slope, pause, then stamp to pack the snow. Do the same with the other snowshoe. Continue the same pattern to build solid snow steps.
- When going up, longer strides are needed because its necessary to step far enough that the new step is not undermined by the previous one.
Monday, December 17, 2012
Breakdown of my 10 Best
Coming to this blog...descriptions of each of the 10 snowshoe hikes currently listed on the home page to the right. Over the coming weeks, the hiker will describe each of his top 10 snowshoe day hikes. No long stories. Just the facts including quick easy directions to the TH, R.T. mileage, difficulty rating, expected skill level needed, elevation gain, recommended map, and contact information to check on snow conditions before you go.
Look for the TOP 10 LIST, coming soon.
Day Pack Essentials (for Snowshoeing)
Snowshoeing requires minimal gear compared to other winter sports. You don't need a lift ticket, season pass, or fashion savy clothes.
If you are a hiker, you already have a day pack. Your pack capacity for a day of snowshoeing should be between 2,000 to 2,500 cu. in.
Your pack should have a few basic features. An adjustable hip belt that can be secured around your waist and adjusted easily with gloves on. Some belts have mini pouches with zippers to hold small but important items like a compass, pocket knife, or personal meds.
Shoulder straps should be padded, and adjustable, to insure your pack is firmly secured with the hip belt resting on your hips. The sternum strap should also be adjustable to insure the shoulder straps are positioned over your shoulders with no gaps between them and your body.
One or two mesh side pockets for extra water bottles are a plus. A long zipper to access the main compartment is good. A second smaller compartment is nice to have for easy access stuff like a trail map, hand/foot warmers, lighter, trail mix, or multi-tool.
If zippers do not have extended pulls, buy some and secure one on each pull tab. If your pack has an internal bladder sleeve, get a bladder and use it. I use a 100 oz. bladder, but depending on length of trip may only take 60/70 oz.. The feeder hose should have an insulated sleeve so it won't freeze solid.
A check of the web for pack manufacturers that make day packs found the following: Jansport, Mountainsmith, Madden, Granite Gear, Quest, The North Face, Eureka, Lowe Alpine, and Vortex. The capacity of their day packs ranged from 2,000 to 3,250 cu.in. and weight from 2 to 4 lbs.
I will introduce another name to the mix...Golite, based in Boulder, Colorado. I use the Golite Peak day pack at 2,350 cu. in. and 1# 10 oz. I have other packs but this one is on my back twelve months a year.
The 13 items you will need plus 7 optional items and their weight:
- Water - 60 oz. +/-
- Xtra Food - 24.0 oz.+/-
- Trail Map - 2.5 oz.
- Compass - .5 oz.
- Sunscreen UPF 30 min. - 3 oz.
- Lip Balm - .5 oz.
- UV Sunglasses - 1.5 oz./Goggles - 4 oz.
- Cell Phone - 4 oz.
- Hand/Foot Warmers - 4.5 oz.
- Xtra Socks - 2.5 oz.
- F. A. Kit - 8.5 oz.
- TP and Trowel - 3.5 oz.
- WP Pack Cover - 3 oz.
- 2 Lg. Trash Bags - 2.5 oz. (Opt.)
- Leatherman Tool - 2.5 oz.(Opt.)
- Space Blanket - 2.0 oz.(Opt.)
- Water/Wind. Proof. Matches - 1 oz.(Opt.)
- Lighter - .5 oz.(Opt.)
- Repair Kit - 3.5 oz.(Opt.)
- Yakx Trax - 4.5 oz.(Opt.)
Total with Opt. items = 10 # 3 oz.
Less optional items = 1 # .5 oz.
Total w/o Opt. items = 9 # 2.5 oz.
Thursday, December 13, 2012
Dress for Snowshoeing
Think layer, layer, LAYER!
Once you leave the trail head or nordic center, your body must be prepared for any weather condition. There is a good chance you will face wind gusts, falling snow, sleet, and anything else Mother Nature decides to throw at you.
Layering is the answer. Regardless if you are going out for an hour, the morning, a day trip or a weekend tour, your body must be able to function at its peak potential. Protection from head to toe is the key to a safe and rewarding snowshoe hike. It was a good day when you release your bindings, slip out of your snowshoes, and say, "What an awesome experience."
Remember, snowshoeing is an aerobic activity. You will be generating lots of body heat. That means you will be stopping to shed a layer, or when at rest, add a layer to maintain body temperature. When selecting clothes for winter activities, they need to be waterproof/windproof and they need to be breathable. In addition, they must have pit zips, pack pockets and two way zippers.
BASE LAYER: Choose lightweight moisture-wicking thermal undies. I use lightweight or midweight Capilene by Patagonia. Capilene glove liners are a good idea too.
INSULATION (MIDDLE) LAYER: A light or medium weight fleece is recommended depending on temperature and overall weather. I use a light fleece by Columbia with zip-off sleeves. That allows me added flexibility.
OUTER LAYER: The jacket and pants must be breathable wind and rain-proof material. My Columbia jacket is hooded, with a zip-out fleece lining. The waist and cuffs can be cinched tight as can the hood. The collar is tall with snaps allowing me to pull the front zipper all the way up to my nose if I want. All pocket zips have extended zip-pulls allowing me to open and close pockets with gloves on in bitter cold.
Pants are rain-proof with a mesh liner. That allows me to either wear long underwear as mentioned above or there is room for fleece liners if weather conditions warrant it. The leg bottoms have water-proof sleeve extensions with elastic and snap tightly around boots, keeping snow and water out. The waist is elastic with ample adjustments. I keep them up by using a pair of Husky suspenders that clip to the waist band.
WHATEVER YOU DO...DON'T WEAR COTTON!
Tuesday, December 11, 2012
Choosing Snowshoes
Before you buy, there are a few things you should know. Unlike the sport of skiing, there is nothing technical about snowshoe gear. You don't need high end clothes, or special boots. Although insulated, high winter boots are best, I slip on a pair of heavy wool socks and go. I wear the same snow pants, insulated hooded jacket, gloves, and knit cap that I wear to shovel snow at the house.
If you are new to snowshoeing, think three things: BINDING, SHAPE and FLOAT.
This series is being written for people who will be snowshoeing for recreational outings, day trips and weekend jaunts with their family.
BINDINGS:
Are normally made of plastic or rubber and are secured to the frame with gromets or rivits. Bindings should be sturdy and durable. The mechanism that secures your boots to your snowshoes should be easy to lock, adjust, and release. You should be able to slip boots in and out of the binding with ease. Most important, you should be able to secure, adjust and release bindings with gloves on in the cold.
SHAPE:
Snowshoes today are designed in either a rouund or tapered configuration. Round shoes are wider providing you better float. The down side is they can cause the wearer to scrape or catch one shoe on the other as you walk. Tapered models can be easier to walk in but have less float.
FLOAT (factor):
Is what keeps you from sinking into that fresh white powder you will be walking on.
Recommendations:
- Visit a local outdoor gear store and talk to one of their experts.
- Dress in the clothes you plan on wearing (or take them with you to dress at the store), including socks, boots, gloves, headgear, and goggles (you must be able to bend down with pack on to adjust/remove your snowshoes in the cold).
- Load your day pack with the essentials (see separate article) you will need. Take it with you to the store (total weight-body plus pack-will determine the size snowshoe best suited for you).
- Take poles or ask for a pair at the gear store (so you can test your ability to walk with snowshoes on, while using poles for balance).
- Try on different brands of snowshoes (Atlas, Red Feather, Crescent Moon, MSR, Tubbs) before making your choice.
- Ask questions and be totally satisfied before you leve the store.
- Inquire about the store return policy.
- How to dress for Snowshoeing
- Saftey and First Aid
- Daypack essentials
- My favorite snowshoe trails (see the home page at far right)
Wednesday, December 5, 2012
Update to 'Hiker Profile'
The hiker updated his blog profile. Check it out on the home page by clicking on "About the Hiker" on the far right below the banner.
Monday, December 3, 2012
Snowshoeing, a Great Workout, and Great Fun
If you have ever hiked any distance, snowshoeing is no different except you have a a pair of tennis rackets strapped to your boots. This is one sport that virtually every person who tries it will love, first time.
You could say that snowshoeing is hiking on snow-covered trails. The nice thing is that you have specially designed gear to help distribute your weight across a much larger area than your boots, thus keeping you atop the snow.
Kids do it. Couples do it. Retirees do it too. Like hiking the Colorado back country all Summer, snowshoes allow you to do it on many of the same trails, in winter. There is no way to explain how different and beautiful the trail you hiked in July is compared to winter, except to go out and do it.
Take it from a person who relishes his solitude, and I do have my favorite spots. In winter, that same spot you sat on to watch a marmot scamper across a pile of scree can provide an entirely different level of solitude. No planes overhead, no birds, no chattering squirrels..get the picture.
Start with this list of clothing and gear.
Clothes
State and national parks designate certain trails as snowshoe trails. They will be marked as such. If you have your own snowshoes or borrow them, start at a local community park or open space you are familiar with. Don't over do it the first time. If your first experience is a good one, you will want to do it again.
More to come on the sport, including favorite trails, where to find gear, how to dress, tips on safety, and much more. Check this blog for these and other related topics.
You could say that snowshoeing is hiking on snow-covered trails. The nice thing is that you have specially designed gear to help distribute your weight across a much larger area than your boots, thus keeping you atop the snow.
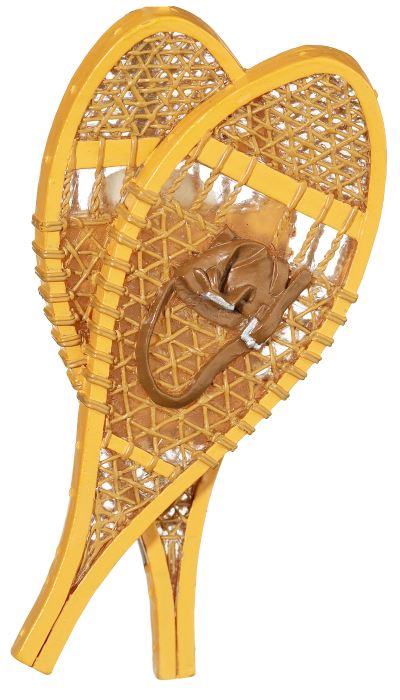 |
| Early snowshoes were made of wood. Decking was a sort of woven tapestry. Bindings were a combination of metal and leather. |
Kids do it. Couples do it. Retirees do it too. Like hiking the Colorado back country all Summer, snowshoes allow you to do it on many of the same trails, in winter. There is no way to explain how different and beautiful the trail you hiked in July is compared to winter, except to go out and do it.
 |
| Modern snowshoes are light, easy to put on and take off with gloves on. |
Take it from a person who relishes his solitude, and I do have my favorite spots. In winter, that same spot you sat on to watch a marmot scamper across a pile of scree can provide an entirely different level of solitude. No planes overhead, no birds, no chattering squirrels..get the picture.
Start with this list of clothing and gear.
Clothes
- Layering of clothes; thermal top and bottom undies, breathable LS shirt or fleeece jacket, waterproof jacket or shell and snowpants
- Waterproof gloves
- Ski Cap
- Wool or synthetic-blend socks (no cotton)
- Waterproof boots
- Gaiters
- Snowshoes (borrow or rent first few times)
- Poles (snow baskets can be affixed to most hiking poles)
- Polarized sunglasses or goggles
- Camelbak
- Daypack with extra socks, sunscreen, fa kit, camera and snacks
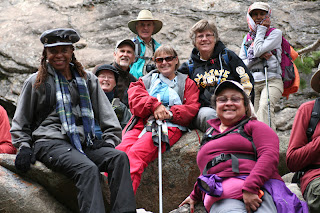
 |
| A group on snowshoes enjoys the back country in winter. |
State and national parks designate certain trails as snowshoe trails. They will be marked as such. If you have your own snowshoes or borrow them, start at a local community park or open space you are familiar with. Don't over do it the first time. If your first experience is a good one, you will want to do it again.
More to come on the sport, including favorite trails, where to find gear, how to dress, tips on safety, and much more. Check this blog for these and other related topics.
Wednesday, November 28, 2012
Out of Control, Really
I watched the movie "Lincoln" yesterday, and was moved to tears as I left the theater. Steven Speilburg has a way of bringing characters, Lincoln (Daniel Day Lewis), Mary Todd Lincoln, (Sally Fields), and Thaddeus Stevens, Chairman of the house ways and means committee, from Pennsylvania, (Tommy Lee Jones), to life.
The film covered Lincolns' final four months of his life. The compelling depiction of our 16th president, made clear the monumental hurdles he endured. Beginning with members of his own Republican party, he fought using every method under the law to further the kind of government the fathers envisioned.
If that was not enough of a burden, the Lincolns' lost their second son, Edward at age 4, their third son, William, at age 12 and their fourth son, Tad at age 18. The president reluctantly allowed his first son, Robert to enlist near the end of the war and was assigned to General Grants' staff. At home, Lincoln dealt with a spouse who was depressed or close to it most of the time.
All of this turmoil surrounding the president and through it all, Lincoln had the responsibility and the capacity to end the war, retain the union and abolish slavery, while maintaining his integrity. A list of tasks of monumental porportion.
Tuesday, November 27, 2012
Tips for Newbie Snowshoers
As a member of the Appalachian Mountain Club (AMC), I receive the bimonthly club magazine, "amc OUTDOORS." The November/December issue featured an article titled 'How to choose the right snowshoes.' After reading the text, it seemed the perfect time to pass along the highlights.
Before you strap on a pair of snowshoes, a few basic things must be considered.
Design: On what type of terrain will you be snowshoeing?
If most of your time will be spent on flat landscapes, with few or no inclines, choose a pair of shoes having a few short teeth for stabilizing your body as you move. Cost = <$200
For those who will be venturing over rolling terrain with some ups, you will want to select snowshoes with more teeth located both in front and back of the area below where your boots are secured. Cost = $175 - $250
If you are the more adventurous type who will be exploring alpine terrain with long steep ups, you will want to look at snowshoes with large gripping teeth positioned along the entire area below your boots. Cost = <$300
Size: Match a size to your body weight plus clothes and pack.
Most snowshoes range from 22" to 36" long.
Binding: You must be able to easily secure, adjust, and remove bindings with gloves on.
It is recommended to borrow or rent a pair of snowshoes for your first few outings before a purchase is made. Then visit a retailer who is both knowledgeable and will take time to properly fit you with snowshoes.
Enjoy the Journey.
Survey for "Boomers"
This past summer, I had conversations with various people about health. At some point in the discussion, I asked if the person is in better general health than their parents. After they answered, I asked, why? The responses were both enlightening and in some cases shocking.
It prompted me to take notes. Later, a matrix showing how people responded was developed.
If you have not responded to this survey before, you are invited to do so. The criteria is you must be a "Boomer" (born between 1946 and 1964). No names or personal information is required. Simply answer the question and explain why you answered as you did.
Examples of responses to date: Exercise, Diet, Environment, Economic hardship, No access/could not afford health care, Lack of education.
Your reason why you are/are not in better health than your parents may be different than those shown.
I look forward to your response. Check this blog for periodic updates on this survey.
Use the "Post a Comment" feature at the bottom of this article or email your response to thecohiker2011@gmail.com
It prompted me to take notes. Later, a matrix showing how people responded was developed.
If you have not responded to this survey before, you are invited to do so. The criteria is you must be a "Boomer" (born between 1946 and 1964). No names or personal information is required. Simply answer the question and explain why you answered as you did.
Indicate if you are Male or Female.
Question: Are you in better general health then your parents?
Answer: Yes or No
Follow-up: Why?
Examples of responses to date: Exercise, Diet, Environment, Economic hardship, No access/could not afford health care, Lack of education.
Your reason why you are/are not in better health than your parents may be different than those shown.
I look forward to your response. Check this blog for periodic updates on this survey.
Use the "Post a Comment" feature at the bottom of this article or email your response to thecohiker2011@gmail.com
Monday, November 26, 2012
Post Season Gathering
In Colorado, it's common to find people enjoying their love of the outdoors. On a chilly October morning, they will be on the Mesa Trail, experiencing the unique cut of the Flatiron peaks against the morning sky...an image that somehow never gets boring. They will be walking their dog(s) in the Sanistas Valley, another mini paradise, outside Boulder. You can bet there will be dozens of them taking "Flatlander" family and friends on trails in RMNP well into fall.
For these outdoor lovers, it's a matter of priority. There is no better way of staying fit through exercise in a natural environment. Get outside. Be inspired to your core. There is no workout gym that can compare to the great outdoors.
Some of these men and women are still in the workforce. Some have the daunting challenge of caring for a family member. There are those who struggle with complications or a particular diagnoses. They all have one thing in common. They know the importance of being active as they age.
Tuesday, October 30, 2012
Snow, Ice Greet Hikers on Last Outing of the Year
Once through the non-bustling and no-traffic-light town of Jamestown, we were soon at the Ceran St. Vrain T.H. Before describing this hike, I found it interesting to learn about the man whose name this trail carries.
Ceran St. Vrain was a descendant of French aristocrats who came to the U.S. during the French Revolution. Born may 5, 1802, near St. Louis, his full name was Ceran de Hault de St. Vrain.
He traded furs near Taos, New Mexico, and trapped near the North Platte River in Colorado. He and his partner William Bent, established the trading post of Bent's Fort. Located on the old Santa Fe Trail, the Fort is listed on the National Register of Historic Places.
After crossing the creek on a long wooden foot bridge, trail follows a section of the South St. Vrain Creek for about two miles. The origin of the creek lies with Isabelle Glacier atop the Continental Divide over two miles away.
Snow and ice continued throughout the hike, causing some of the nine hearty hikers to take added precaution in terms of footing. Areas of dense pine kept snow from reaching the ground in places. Trail ups and downs did provide hikers without a pair of Rax Trax (mini spikes) a bit more concern.
Ceran St. Vrain was a descendant of French aristocrats who came to the U.S. during the French Revolution. Born may 5, 1802, near St. Louis, his full name was Ceran de Hault de St. Vrain.
 |
| Footing was not the best due to ice and snow. Photo by Bob Seckman. |
He traded furs near Taos, New Mexico, and trapped near the North Platte River in Colorado. He and his partner William Bent, established the trading post of Bent's Fort. Located on the old Santa Fe Trail, the Fort is listed on the National Register of Historic Places.
After crossing the creek on a long wooden foot bridge, trail follows a section of the South St. Vrain Creek for about two miles. The origin of the creek lies with Isabelle Glacier atop the Continental Divide over two miles away.
 |
| One of those candidates for framing. Photo by Barbara Peck |
Snow and ice continued throughout the hike, causing some of the nine hearty hikers to take added precaution in terms of footing. Areas of dense pine kept snow from reaching the ground in places. Trail ups and downs did provide hikers without a pair of Rax Trax (mini spikes) a bit more concern.
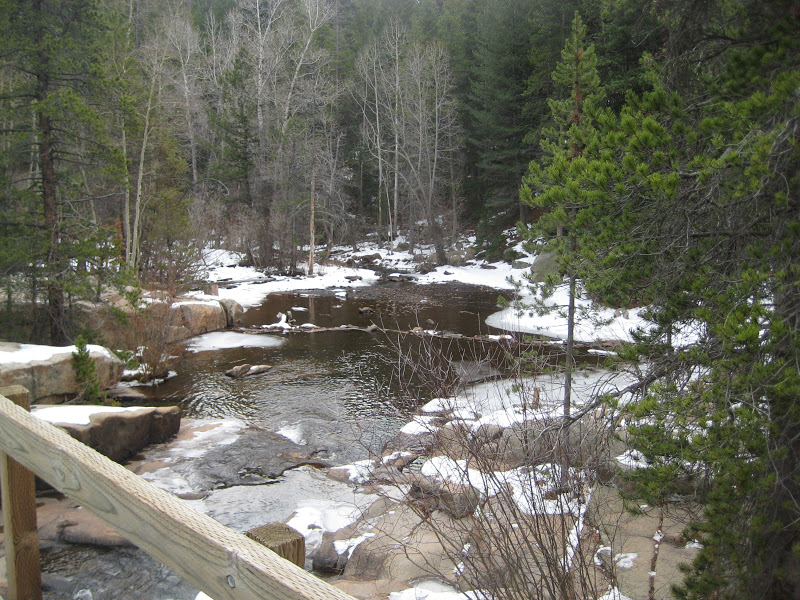 |
| View of the creek from the bridge. Photo by Bob Seckman |
Monday, October 29, 2012
Improve Self-Confidence
Soon after this blog went live on July 18, 2011, a ten part column titled "Ten ways to improve ones quality of life," was posted. The intent was to define in some detail one of the three goals of this blog, i.e., promote a healthy lifestyle, improve quality of life (especially for those with Parkinson's) and raise funds for PAR (Parkinson's association of the Rockies).
This is the final element of the column. If you found something in this series that influended you to make a change in your life for the better, we want to hear from you.
You can either comment directly to the author at the end of any article (see comment window), or email your comments to thecohiker2011@gmail.com
Item #10:
Increase Self-confidence: It begins with your ability to recognize broken thoughts or actions...things you do during the course of the day that you don't finish, but you accept it because you find a way to justify it.
Example: While in line at the grocery store, you find an interesting article in a magazine but have no time to read it. Don't put it back on the rack, instead put it on the checkout line, take it with you. When you get home read it. It may change something in your life. It may make you think differently about something. It may revive a dormant ambition you once had to take a class, learn a second language, or reconnect with an old friend, or even do something bold.
Regaining/increasing self-confidence does not happen over night. Be patient. Learn to be a person with a purpose. Find your passion. Regain the basic principles that made you who you are. They are a big part of who you are.
Set achievable goals as you build confidence. As you achieve, set additional goals. Always focus on finishing not on how long it takes you to reach a goal. Focus on solutions to problems, not on the problem itself.
Above all, SMILE!
Friday, October 26, 2012
The Spice of Sports...Competition
Nothing beats watching our two grandsons do what they love...sports. It begins with organized activities, i.e. wrestling, baseball, lacrosse, hockey, and soccer. Other team/group activities at school include track, and choir. They also enjoy time with friends at birthday parties, bowling, movies, and attending various professional sports venues in the Denver metro area.
There is a long list of memorable experiences with these boys. My favorites include ziplining across the Colorado River at Glenwood Canyon, camping four days in the Weminuche Wilderness, skydiving, whitewater rafting, climbing a 14er. (Democrat), hiking Eldorado Canyon, being lost in the Flatirons, exploring the Collegiate Peaks on horse back, and a trip to PA., to visit historic Philadelphia and reunite with family.
My wife and me are grateful for the opportunities we have had to watch our grandsons compete. At twelve and ten, they have played more games, ran more laps, competed in more gyms, and stadiums, and seen more of this country than their parents and grandparents combined.
It was not as frantic a pace with their parents, and certainly not the generations before that.
Examples: Their father played soccer, basketball, and baseball. An avid skier since childhood in Ipswich, Mass., it is downhill that remains his passion.
Their mother (our oldest daughter) played softball, field hockey, and soccer. She also competed in track and field events, i.e. 300m hurdles, high jump, 1600m relay, and shot put. Both are competitive in life as they are in sports.
There is a long list of memorable experiences with these boys. My favorites include ziplining across the Colorado River at Glenwood Canyon, camping four days in the Weminuche Wilderness, skydiving, whitewater rafting, climbing a 14er. (Democrat), hiking Eldorado Canyon, being lost in the Flatirons, exploring the Collegiate Peaks on horse back, and a trip to PA., to visit historic Philadelphia and reunite with family.
My wife and me are grateful for the opportunities we have had to watch our grandsons compete. At twelve and ten, they have played more games, ran more laps, competed in more gyms, and stadiums, and seen more of this country than their parents and grandparents combined.
 |
| Taunting the catcher. |
 |
| Dylan always goes hard to first. |
 |
| I wouldn't change anything. |
Examples: Their father played soccer, basketball, and baseball. An avid skier since childhood in Ipswich, Mass., it is downhill that remains his passion.
Their mother (our oldest daughter) played softball, field hockey, and soccer. She also competed in track and field events, i.e. 300m hurdles, high jump, 1600m relay, and shot put. Both are competitive in life as they are in sports.
Tuesday, October 23, 2012
Where is Reynolds Park???
Little-known parks and Open Space(s) are all over the Denver Metro area. One of the more popular offerings is the Jefferson County Open Space system. There are 210 miles of trails and 52,000 acres over 28 parks and properties, offered to the public.
As we headed out of the city on Highway 285, I was reminded this would be the last time any of us would visit the area this hiking season. After next week, the season is over.
Today, our trail experience would be in Reynolds Park, a 1,984 acre gem Southeast of Conifer. The site offers hikers 7 miles of easy/moderate rated hiking trails. As we learned by stepping over or around numerous deposits on trail, the park is open to both hikers and equestrians.
Ed turned off on Foxton Road, and traveled 5.5 miles to a parking lot under renovation. It was actually cordoned off. So we continued a short distance to another lot. The Chickadee TH (7,141'), is where we began the hike.
A brief trek (.2 mi.) on Chickadee, brought us to a junction with Hummingbird Trail. Over the next 1/2 mi., we would experience much of the 1,200' el. gain on the day. Trail to this point was dry, solid, and well trodden.
As we gained altitude, a number of views were provided along the way. Nothing close to what we saw the past two weeks in RMNP, but worth a click of the shutter a few times for sure.
The final .3 mi. of Hummingbird is down. Certainly, it was a welcome feeling for two first-timers with us. Monica and Debbie surprised themselves today. Not knowing what to expect, they both proved with a bit of determination and a large portion of guts, a challenge like this feels good when you finish.
As we headed out of the city on Highway 285, I was reminded this would be the last time any of us would visit the area this hiking season. After next week, the season is over.
Today, our trail experience would be in Reynolds Park, a 1,984 acre gem Southeast of Conifer. The site offers hikers 7 miles of easy/moderate rated hiking trails. As we learned by stepping over or around numerous deposits on trail, the park is open to both hikers and equestrians.
Ed turned off on Foxton Road, and traveled 5.5 miles to a parking lot under renovation. It was actually cordoned off. So we continued a short distance to another lot. The Chickadee TH (7,141'), is where we began the hike.
 |
| Chickadee Trail, mid-morning. |
 |
| Gaining elevation on Hummingbird Trail. |
As we gained altitude, a number of views were provided along the way. Nothing close to what we saw the past two weeks in RMNP, but worth a click of the shutter a few times for sure.
 |
| Views like this were worth stopping for. |
The final .3 mi. of Hummingbird is down. Certainly, it was a welcome feeling for two first-timers with us. Monica and Debbie surprised themselves today. Not knowing what to expect, they both proved with a bit of determination and a large portion of guts, a challenge like this feels good when you finish.
Thursday, October 18, 2012
Bridal Veil Falls, Ya Gotta Love it!
This small yet captivating falls in RMNP is one of my all-time favorite hikes. Get there early - any day of the week because this one is popular - to get a parking spot along the dirt access road. Hikers will find the falls an invigorating payoff after negotiating some knarly boulders and steep jagged rock steps.
The ACAA van was ahead of my friend Curt and me as we approached the end of McGraw Ranch Road and the TH at 7,808' el.. I say ahead because Curt and me were in my vehicle so two other hikers could ride the van. In all, a record number 16 hikers set foot on trail today.
The TH is home to the McGraw Ranch Research Facility. The ranch, also known as Indian Head Ranch, was established in 1884 when Peter J. Pauley Jr. built a barn on the site. The Pauley family kept 2,500 head of cattle on 160 acres at the time.
After the National Park Service bought the ranch, thanks to the National Trust for Historic Preservation, the ranch underwent a $2 million rehabilitation (the parks largest project) completed in 2003.
Today, research conducted on site includes elk studies, a butterfly inventory, rare plant studies, fire history, and glacier monitoring. Buildings are not open to the public.
Hikers enter through a gate at the main building, and pass by a number of small cabins used to house researchers.
After passing a privy, trail follows a west and northwest direction for just over three miles to the base of Bridal Veil Falls, tallest in the park at 8,865' el..
Trail parallels Cow Creek for the first mile, then crosses the stream a few times. Most crossings are by log.
Soon trail enters a more dense forest and begins a gentle climb to the falls. Closer to the falls, trail becomes rocky. The last few tenths of a mile, hikers must negotiate a series of steep rock steps, some natural, others made by trail crews.
If you enjoy a bit of a challenge on trail, this is the one for you. Not only are you required to negotiate a number of smooth boulders, some hand over foot climbing is required in order to get to the falls.
Once at the base of the falls, the payoff is the setting. The immediate area around the falls is populated by dense forest. The continuous mist from the falls provides a cooling effect in warm weather and a no less beautiful natural spot for pics any time of year.

If you are the adventurous type - many HCH members were - you can climb the exposed roots and rocks beside the falls to the top. Or stop at a number of spots along the way to pick a rock, sit and enjoy lunch or simply enjoy the setting.
Total miles = 6.4
Total elevation gain = 1,057'
Only two more hikes in the official hiking season. Next week we hike in Reynolds Park, outside Conifer.
The final week (Oct. 30th.), we hike the Cerain - St. Vrain Trail, close to Jamestown.
It's on Halloween. To those HCH members who are registered for that hike, consider it your one and only chance to dress in costume for a hike. Nothing restrictive or long flowing capes that may get caught on rocks or branches. Dress for the weather as a base layer and dress for Halloween as the outer layer. Face paint can take the place of a mask. Be creative. Think about it...the group photo will be a keeper. It will be a fun day to end the season.
The ACAA van was ahead of my friend Curt and me as we approached the end of McGraw Ranch Road and the TH at 7,808' el.. I say ahead because Curt and me were in my vehicle so two other hikers could ride the van. In all, a record number 16 hikers set foot on trail today.
The TH is home to the McGraw Ranch Research Facility. The ranch, also known as Indian Head Ranch, was established in 1884 when Peter J. Pauley Jr. built a barn on the site. The Pauley family kept 2,500 head of cattle on 160 acres at the time.
 |
| Marker at junction of Bridal Veil Falls Trail and Black Canyon Trail. |
Today, research conducted on site includes elk studies, a butterfly inventory, rare plant studies, fire history, and glacier monitoring. Buildings are not open to the public.
Hikers enter through a gate at the main building, and pass by a number of small cabins used to house researchers.
 |
| Hikers on the way to the falls. |
After passing a privy, trail follows a west and northwest direction for just over three miles to the base of Bridal Veil Falls, tallest in the park at 8,865' el..
Trail parallels Cow Creek for the first mile, then crosses the stream a few times. Most crossings are by log.
 |
| Luisa crosses one of a number of log bridges. |
Soon trail enters a more dense forest and begins a gentle climb to the falls. Closer to the falls, trail becomes rocky. The last few tenths of a mile, hikers must negotiate a series of steep rock steps, some natural, others made by trail crews.
 |
| One of many photo ops along trail. |
If you enjoy a bit of a challenge on trail, this is the one for you. Not only are you required to negotiate a number of smooth boulders, some hand over foot climbing is required in order to get to the falls.
 |
| Chipmunks want to be your best buddy. |
 | ||||||||||||||||||||||||||||||||||||||||||||||||||||||||||||||||||||||||||||||||||||||||||||||||||||||||||||||||||||||||||||||||||||||||||||||||||||||||||||||||||||||||||||||||||||||||||||||||||||||||||||||||||
| A Stellar Jay stalks hikers looking for food. |


 |
| Carried the wrong lens...so it's a three image group pic. |
If you are the adventurous type - many HCH members were - you can climb the exposed roots and rocks beside the falls to the top. Or stop at a number of spots along the way to pick a rock, sit and enjoy lunch or simply enjoy the setting.
Total miles = 6.4
Total elevation gain = 1,057'
Only two more hikes in the official hiking season. Next week we hike in Reynolds Park, outside Conifer.
The final week (Oct. 30th.), we hike the Cerain - St. Vrain Trail, close to Jamestown.
It's on Halloween. To those HCH members who are registered for that hike, consider it your one and only chance to dress in costume for a hike. Nothing restrictive or long flowing capes that may get caught on rocks or branches. Dress for the weather as a base layer and dress for Halloween as the outer layer. Face paint can take the place of a mask. Be creative. Think about it...the group photo will be a keeper. It will be a fun day to end the season.
Thursday, October 11, 2012
Gala Event to Raise $ for PAR
Next week is the 5th Annual Gala held in Denver to benefit the Parkinson Association of the Rockies. Billed as the Dazzle and Delight event of the year, PAR is counting on those in the community to support this event both with their attendance and their pocket book.
Yes, bids...as in place your bid for items donated by people in the community who live with PD. You will find everything from autographed baseballs, to jewelry, hand painted items and photography.
All items for bid have been listed on a web site. A detailed description is given plus a value and minimum bid amount. Bidding is currently open and will continue online till 9:00 a.m., October 17th. The event is being held that night at the Ritz-Carlton, Downtown Denver.
Check out all the items up for bid. Make a selection and submit your bid.
Items can be found at: www.blacktie-colorado.com
Wednesday, October 10, 2012
RMNP - A Special Place
It was surprising and unusual to have empty seats on the van headed for one of the premier outdoor environments in Colorado. For ten HCH members, however, it was a day to remember.
I will attempt to explain some of the reasons not to EVER miss an opportunity to hike in the park.
Wildlife is one thing you expect to see when in any of our national parks. In 2012, the High Country Hiker group encountered limited wildlife. We are talking an occasional chipmunk scooting across trail, and the chatter of a squirrel high above in its nest someplace. The only other two or four-legged animals included a few white tail deer.
In terms of winged creature sightings, there were a number Grey Jays. The birds are notorious for dive bombing a hiker on trail or like chipmunks, they will walk up to your backpack and check it out. Some might call these members of the crow family ruthless the way in which they sit on a branch watching you. Some movement - the extension of your arm with food in it I know is one - is an invitation for one to swoop down and try snatching it out of your grasp. It happened while having lunch at Fern Lake.
The only "Wildlife" we saw today was a herd of female elk (Cows) bedded down in a stand of pine trees as we entered Estes Park. Approaching an intersection on the outskirts of town, a bull elk (Wapiti) was spotted making his way across a grassy area toward his harem.
In terms of terrain, the park provides visitors a full range. We experienced much of it during the hike on Upper Beaver Meadows Loop trail today.
We began at the Beaver Meadows TH, and headed north through a grassy meadow. Trail soon turned west as it entered an area of dense spruce, and lodge pole pine. Most of the 500'+ elevation gain on the day would be experienced in the next two miles.
That span took us on a traverse along Beaver Mountain reaching a max. of 9,250' el. Except for a few low volume runoffs, and crossing Beaver Brook at 8,750' el., trail remained dry and solid all day. Trail difficulty to this point was tame in terms of exposed rock and root growth. No switchbacks on this loop were needed to reduce the level of difficulty.
 |
| Longs Peak |
I will attempt to explain some of the reasons not to EVER miss an opportunity to hike in the park.
Wildlife is one thing you expect to see when in any of our national parks. In 2012, the High Country Hiker group encountered limited wildlife. We are talking an occasional chipmunk scooting across trail, and the chatter of a squirrel high above in its nest someplace. The only other two or four-legged animals included a few white tail deer.
 |
| Ed points to features across the meadow. |
In terms of winged creature sightings, there were a number Grey Jays. The birds are notorious for dive bombing a hiker on trail or like chipmunks, they will walk up to your backpack and check it out. Some might call these members of the crow family ruthless the way in which they sit on a branch watching you. Some movement - the extension of your arm with food in it I know is one - is an invitation for one to swoop down and try snatching it out of your grasp. It happened while having lunch at Fern Lake.
 |
| Longs Peak, from the traverse on Beaver Mountain. |
The only "Wildlife" we saw today was a herd of female elk (Cows) bedded down in a stand of pine trees as we entered Estes Park. Approaching an intersection on the outskirts of town, a bull elk (Wapiti) was spotted making his way across a grassy area toward his harem.
 |
| Lehman and Marilynn hike through a stand of Aspen. |
In terms of terrain, the park provides visitors a full range. We experienced much of it during the hike on Upper Beaver Meadows Loop trail today.
We began at the Beaver Meadows TH, and headed north through a grassy meadow. Trail soon turned west as it entered an area of dense spruce, and lodge pole pine. Most of the 500'+ elevation gain on the day would be experienced in the next two miles.
 |
| The view during lunch. |
That span took us on a traverse along Beaver Mountain reaching a max. of 9,250' el. Except for a few low volume runoffs, and crossing Beaver Brook at 8,750' el., trail remained dry and solid all day. Trail difficulty to this point was tame in terms of exposed rock and root growth. No switchbacks on this loop were needed to reduce the level of difficulty.
 |
| Pat, Penny, Ed, and Bob head for the TH. |
Monday, October 8, 2012
Alternative to the Gym Exercise Routine
Exercising in a gym - BORING
Exercising in the backcountry - EXHILIRATING
Consider this comparison:
GYM BACKCOUNTRY
Overcrowded parking lots No lines telling you where to park
Spandex tights and fancy garb Comfy convertible pants and wicking tee
Pull those heavy doors open No doors - Start hiking
Show ID, Club Card, or Pass No ID needed - Start hiking
Start at a less favorite station No apparatus - Start hiking
because
all the treadmills are in use No treadmills - Start hiking
That said...Around every bend in trail is a different landscape. All the sweet smelling fresh air your lungs can handle is at your disposal. Continuous decision-making, i.e., where to step, where to plant poles, how to negotiate the rock formations ahead, all things to make and help strengthen connections in ones brain.
Outdoor exercise can burn up to 20 percent more calories than indoor exercise. Why? Because the body must continually fight to stay stable on uneven terrain and maintain its temperature in all kinds of weather.
Chances are you will get a harder workout in nature because your focus is on the effort, not the screen up on the wall or the LED display on your apparatus.
One study found that outdoor exercise cuts heart disease by boosting levels of vitamin D.
Hiking is a low impact exercise. So it's good for those of us with arthritus. Hiking strengthens lower leg and thigh muscles. Using poles takes pressure off knee joints. Plus swinging the arms when using poles provides a virtual full body workout.
Movements associated with hiking help to dilate the arteries, reducing blood pressure taking stress off the heart. HDL (good cholesterol) levels are increased when hiking. Plus, when you increase your pace on trail you get an aerobic workout to help tone your heart.
Therapy...I don't need therapy you say. Well, there is something therapeutic about being outdoors in nature. Hiking on a sunny day gives you an extra dose of vitamin D.
So if your gym workout routine seems monotonous, and a bit pricey, choose a different path. Call a friend, GO HIKING.
Sources: Men's Journal; Healthmad.com/fitness
Watch for the next installment on exercise for those over 50 on this blog.
Exercising in the backcountry - EXHILIRATING
Consider this comparison:
GYM BACKCOUNTRY
Overcrowded parking lots No lines telling you where to park
Spandex tights and fancy garb Comfy convertible pants and wicking tee
Pull those heavy doors open No doors - Start hiking
Show ID, Club Card, or Pass No ID needed - Start hiking
Start at a less favorite station No apparatus - Start hiking
because
all the treadmills are in use No treadmills - Start hiking
That said...Around every bend in trail is a different landscape. All the sweet smelling fresh air your lungs can handle is at your disposal. Continuous decision-making, i.e., where to step, where to plant poles, how to negotiate the rock formations ahead, all things to make and help strengthen connections in ones brain.
 |
| Look up, see this,then tell me you should be at the gym. |
Outdoor exercise can burn up to 20 percent more calories than indoor exercise. Why? Because the body must continually fight to stay stable on uneven terrain and maintain its temperature in all kinds of weather.
Chances are you will get a harder workout in nature because your focus is on the effort, not the screen up on the wall or the LED display on your apparatus.
 |
| This versus the treadmill...what are you gonna do? |
One study found that outdoor exercise cuts heart disease by boosting levels of vitamin D.
Hiking is a low impact exercise. So it's good for those of us with arthritus. Hiking strengthens lower leg and thigh muscles. Using poles takes pressure off knee joints. Plus swinging the arms when using poles provides a virtual full body workout.
Movements associated with hiking help to dilate the arteries, reducing blood pressure taking stress off the heart. HDL (good cholesterol) levels are increased when hiking. Plus, when you increase your pace on trail you get an aerobic workout to help tone your heart.
Therapy...I don't need therapy you say. Well, there is something therapeutic about being outdoors in nature. Hiking on a sunny day gives you an extra dose of vitamin D.
 |
| Gym, what gym, I don't belong to a gym. |
So if your gym workout routine seems monotonous, and a bit pricey, choose a different path. Call a friend, GO HIKING.
Sources: Men's Journal; Healthmad.com/fitness
Watch for the next installment on exercise for those over 50 on this blog.
Subscribe to:
Posts (Atom)