They make us think about the good times. They renew a sense of belonging. They provide a feeling of family pride, and of a long and rich family history. Traditions renew the spirit of giving.
One tradition my family has enjoyed as long as I can remember, is baking cookies. It is one of many fun things I did as a boy. After 66 years, I am still doing it with my two grandsons.

Monday, December 31, 2012
Sunday, December 30, 2012
Snowshoeing Techniques - Part 10

Etiquette
(Part 10 of 10)
- Xcountry skiers work hard to make their tracks. So when breaking trail, you encounter a Xcountry track, either step over it or break trail along side.
- Skiers have the right-of-way. It's easier for a snowshoer to step and change direction than a skier.
- When with a group, remain single file, and use the leaders prints.
- Always be polite and respect other outdoor enthusiasts.
- When back at the TH, nordic center, or resort, remove your snowshoes, cinch them together cleat to cleat, and hang them on a rack provided, or out of the way of people traffic.
- Poles should be fully collapsed and cinched to your pack or hung with your snowshoes until you are ready to leave.
Saturday, December 29, 2012
Snowshoeing Techniques - Part 9
Safety
(Part 9 of 10)
- Stay on established trails.
- Keep within your physical abilities.
- Do not snowshoe alone.
- Take breaks, don't get overheated
- Stay dry
- Use common sense when deciding how best to reach a hilltop or maneuver through a stand of trees or exposed rocks.
- Be familiar with signs of hypothermia. Keep head, hands, and feet warm. That is where you loose heat the quickest.
- Before leaving for the TH, let someone know where you are going and when you expect to return.
Friday, December 28, 2012
Snowshoeing Techniques - Part 8
Breaking Trail/Stride:
(Part 8 of 10)
- If you go with friends (recommended) always take turns leading in virgin snow.
- Those who are more energetic should go first as long as it is practical and safe.
- A few minutes breaking trail for each leader is enough.
- In deep snow your steps will be shorter and your lift higher.
- The leader must consider the pace of the slowest member of the group.
- The leader must make their steps short enough so everyone can follow in them.
- Those following should use the leaders footsteps to conserve energy plus it keeps a well defined trail.
- Take plenty of breaks to rehydrate, adjust bindings, and rest.
- If the leader encounters a Xcountry track, step over it or break trail for snowshoers along side.
- Do not step on a Xcountry track, or be labeled the back country bully.
- Keep your stride and gait comfortable as you move.
Thursday, December 27, 2012
Snowshoeing Techniques - Part 7
Powder and Ice:
(Part 7 of 10)
- The deeper the powder the shorter your steps will be.
- You will use more energy in deep powder because you will be lifting each snowshoe higher.
- Take it slow and take breaks...speed is not an issue.
- If you encounter ice or a hard crust on top of snow, stop and survey the terrain. If there is an easy way around the condition, take it. If not, and you have a pair or crampons or yax trax in your pack, use them.
Wednesday, December 26, 2012
Snowshoeing Techniques - Part 6
Poles
(Part 6 of 10)
On flat terrain, consider using poles as an option. My recommendation, if you decide not to use them strap them to your pack anyway. You won't regret it.
- Adjustable hiking poles are best. To convert them from summer hiking use to snowshoeing, simply add a snow basket to the bottom of each pole. Most manufacturers design a threaded area into the bottom of each post, directly above the tip, to allow you to twist a snow basket into place.
- Baskets come in various diameters. Larger baskets will cover more area when the pole is planted in snow, keeping you from sinking too deep in powder. I keep more than one diameter basket on hand.
- Pole length should provide for your forearm to be at a 90-degree angle while standing on flat terrain. To get the proper pole length, flip each pole upside down. With your forearm at a 90-degree angle, hold one pole under the basket and adjust it as required for the proper length. Same with pole two.
- Shorten poles when ascending a slope, lengthen them when descending a slope.
- When traversing, one pole can be lengthened the other shortened as needed.
- Hands should be fed thru the pole straps from the bottom up. Then grab the finger grips. The strap will fall naturally over the top of your hand. This allows you to rest your hands when needed. Straps will still be around your hand providing a quick easy recovery.
Tuesday, December 25, 2012
Snowshoeing Techniques - Part 5
Descending:
(Part 5 of 10)
- When coming down slope, as you step put your weight on the back part of the snowshoe so the heel cleat provides traction.
- In soft powder, you can go straight down the slope because you will be able to dig your heels in easier.
- Similar to side-stepping on an ascent (see part3), to come down slope, put weight on the upside edge of your snowshoe. Again, be sure your steps are far enough apart that they do not collapse on each other.
Monday, December 24, 2012
Snowshoeing Techniques - Part 4
Traversing and Switchbacking:
(Part 4 of 10)
Traversing and creating a switchback are ways you can ascend a slope rather than taking a direct line to the top. This method is best used when snow is hard or has a crust on top.
- Kick in the front edge of each snowshoe as you climb at an angle.
- If a trail includes switchbacks up a slope, first assess if there is a better way. Making your own angled switchbacks may prove better for you. If not, follow the switchbacks provided.
- Your poles should be adjusted shorter on the uphill side longer on the downhill side.
- When you change switchback direction, exchange poles from hand to hand as you move up slope.
- Remember, snowshoes have cleats to give you traction so you can move around trees, rock formations, and questionable frozen streams with confidence.
Sunday, December 23, 2012
Note on Part 3 of 10
Not sure what occurred but part 3 got posted before parts 1 and 2 for some reason. You can find part 3 posted on December 19th below. Scroll down, it's there. Sorry!
Saturday, December 22, 2012
Snowshoeing Techniques - Part 2
Stamping and Edging:
(Part 2 of 10)
- Stand in place. Step out touching the heel first then the toe to the snow before applying your weight to that foot. This is stamping.
- The technique is used when breaking trail (see part 8).
- Edging is when you plant the edge of your snowshoe into the snow then apply weight to the outside edge making a step.
- This technique is used when climbing a slope by ascending sideways.
Friday, December 21, 2012
Snowshoeing Techniques - Part 1
First Steps:
(Part 1 of 10 parts)
At the end of the day, you want time spent outdoors to be enjoyable. Keep a few things in mind as you are introduced to this new adventure.
- Begin on a flat path, or open space with packed snow.
- Keep a natural stride and gait just like walking.
- If you scrape the opposite snowshoe, widen the gap a bit.
- If you have difficulty with balance, use poles (see part 6).
- Swing arms naturally - right foot/left arm, left foot/right arm, just like walking.
- On flat terrain, roll over onto your front, bring one knee up while pushing with your arms to a half kneeling position. Then to a standing position. Use your poles for support.
- Grab the hand of a buddy or a tree branch to pull yourself up.
- Remove pack, position it beside you (uphill), roll over onto your front then push off with your arms.
- On descents, take your hands out of the straps, and place poles beside you. Roll over to get your knees under you facing into the slope. Use poles as a brace while coming to a standing position. .
- Walk in a circle if space and conditions permit.
- "Step Turn"; Lift one snowshoe placing it at a 90-degree angle in front of the other snowshoe forming a "T." Do it again for a full turn.
- "Kick Turn"; Lift one snowshoe placing it a full 180-degrees and beside the other snowshoe. Bring the trailing snowshoe along side. Use this method in tight places.
Thursday, December 20, 2012
Introducing the Snowshoe Technique Series

Starting tomorrow, for the next ten days, this series will inform you of the things to keep in mind as you begin learning the fundamentals of snowshoeing. It's as easy as saying "If you can walk, you can snowshoe." The learning curve is short. There is no huge investment for special boots or clothing. You don't need to get a lift ticket or stand in line to do what you want to do.
This series is written with those who have not been on snowshoes before in mind. To those who consider themselves skilled shoers, you to may find something in this series you forgot or were not aware of. So check it out either way.
After this series, I will break down each of my top ten snowshoe hikes (right side of the home page) including directions to the TH, level of difficulty, skill level, elevation, map needed and contact information.
Lets go have some fun!
Wednesday, December 19, 2012
Snowshoeing Techniques - Part 3
Ascending:
(Part 3 of 10)
Going up a grade and across hills requires some skill.
- Stepping or Stepping-up (easy/moderate slopes): Face directly uphill and make the first step into the snow with some weight on your toes as you secure the front claws into the slope.Follow with the trailing snowshoe securing the claws comfortably above the first.
- Herringbone stepping (moderate slopes): Face uphill with snowshoes facing out at a 45-degree angle. Place your weight on the outside of each snowshoe as you climb to maintain traction.
- Scrambling (moderate slopes): This is an aggressive method of stepping in a fast paced pattern. Keep weight on your toes for traction.
- Side stepping (steep slopes): Turn your body sideways to the slope and take sideward steps up grade. With your lead snowshoe, step to the up side of the hill making a shelf in the snow. Bring the trailing snowshoe to the step your other snowshoe just vacated.
- Kick Stepping (Deep snow and steep mountains): Facing the slope, kick the toe of one snowshoe into the slope, pause, then stamp to pack the snow. Do the same with the other snowshoe. Continue the same pattern to build solid snow steps.
- When going up, longer strides are needed because its necessary to step far enough that the new step is not undermined by the previous one.
Monday, December 17, 2012
Breakdown of my 10 Best
Coming to this blog...descriptions of each of the 10 snowshoe hikes currently listed on the home page to the right. Over the coming weeks, the hiker will describe each of his top 10 snowshoe day hikes. No long stories. Just the facts including quick easy directions to the TH, R.T. mileage, difficulty rating, expected skill level needed, elevation gain, recommended map, and contact information to check on snow conditions before you go.
Look for the TOP 10 LIST, coming soon.
Day Pack Essentials (for Snowshoeing)
Snowshoeing requires minimal gear compared to other winter sports. You don't need a lift ticket, season pass, or fashion savy clothes.
If you are a hiker, you already have a day pack. Your pack capacity for a day of snowshoeing should be between 2,000 to 2,500 cu. in.
Your pack should have a few basic features. An adjustable hip belt that can be secured around your waist and adjusted easily with gloves on. Some belts have mini pouches with zippers to hold small but important items like a compass, pocket knife, or personal meds.
Shoulder straps should be padded, and adjustable, to insure your pack is firmly secured with the hip belt resting on your hips. The sternum strap should also be adjustable to insure the shoulder straps are positioned over your shoulders with no gaps between them and your body.
One or two mesh side pockets for extra water bottles are a plus. A long zipper to access the main compartment is good. A second smaller compartment is nice to have for easy access stuff like a trail map, hand/foot warmers, lighter, trail mix, or multi-tool.
If zippers do not have extended pulls, buy some and secure one on each pull tab. If your pack has an internal bladder sleeve, get a bladder and use it. I use a 100 oz. bladder, but depending on length of trip may only take 60/70 oz.. The feeder hose should have an insulated sleeve so it won't freeze solid.
A check of the web for pack manufacturers that make day packs found the following: Jansport, Mountainsmith, Madden, Granite Gear, Quest, The North Face, Eureka, Lowe Alpine, and Vortex. The capacity of their day packs ranged from 2,000 to 3,250 cu.in. and weight from 2 to 4 lbs.
I will introduce another name to the mix...Golite, based in Boulder, Colorado. I use the Golite Peak day pack at 2,350 cu. in. and 1# 10 oz. I have other packs but this one is on my back twelve months a year.
The 13 items you will need plus 7 optional items and their weight:
- Water - 60 oz. +/-
- Xtra Food - 24.0 oz.+/-
- Trail Map - 2.5 oz.
- Compass - .5 oz.
- Sunscreen UPF 30 min. - 3 oz.
- Lip Balm - .5 oz.
- UV Sunglasses - 1.5 oz./Goggles - 4 oz.
- Cell Phone - 4 oz.
- Hand/Foot Warmers - 4.5 oz.
- Xtra Socks - 2.5 oz.
- F. A. Kit - 8.5 oz.
- TP and Trowel - 3.5 oz.
- WP Pack Cover - 3 oz.
- 2 Lg. Trash Bags - 2.5 oz. (Opt.)
- Leatherman Tool - 2.5 oz.(Opt.)
- Space Blanket - 2.0 oz.(Opt.)
- Water/Wind. Proof. Matches - 1 oz.(Opt.)
- Lighter - .5 oz.(Opt.)
- Repair Kit - 3.5 oz.(Opt.)
- Yakx Trax - 4.5 oz.(Opt.)
Total with Opt. items = 10 # 3 oz.
Less optional items = 1 # .5 oz.
Total w/o Opt. items = 9 # 2.5 oz.
Thursday, December 13, 2012
Dress for Snowshoeing
Think layer, layer, LAYER!
Once you leave the trail head or nordic center, your body must be prepared for any weather condition. There is a good chance you will face wind gusts, falling snow, sleet, and anything else Mother Nature decides to throw at you.
Layering is the answer. Regardless if you are going out for an hour, the morning, a day trip or a weekend tour, your body must be able to function at its peak potential. Protection from head to toe is the key to a safe and rewarding snowshoe hike. It was a good day when you release your bindings, slip out of your snowshoes, and say, "What an awesome experience."
Remember, snowshoeing is an aerobic activity. You will be generating lots of body heat. That means you will be stopping to shed a layer, or when at rest, add a layer to maintain body temperature. When selecting clothes for winter activities, they need to be waterproof/windproof and they need to be breathable. In addition, they must have pit zips, pack pockets and two way zippers.
BASE LAYER: Choose lightweight moisture-wicking thermal undies. I use lightweight or midweight Capilene by Patagonia. Capilene glove liners are a good idea too.
INSULATION (MIDDLE) LAYER: A light or medium weight fleece is recommended depending on temperature and overall weather. I use a light fleece by Columbia with zip-off sleeves. That allows me added flexibility.
OUTER LAYER: The jacket and pants must be breathable wind and rain-proof material. My Columbia jacket is hooded, with a zip-out fleece lining. The waist and cuffs can be cinched tight as can the hood. The collar is tall with snaps allowing me to pull the front zipper all the way up to my nose if I want. All pocket zips have extended zip-pulls allowing me to open and close pockets with gloves on in bitter cold.
Pants are rain-proof with a mesh liner. That allows me to either wear long underwear as mentioned above or there is room for fleece liners if weather conditions warrant it. The leg bottoms have water-proof sleeve extensions with elastic and snap tightly around boots, keeping snow and water out. The waist is elastic with ample adjustments. I keep them up by using a pair of Husky suspenders that clip to the waist band.
WHATEVER YOU DO...DON'T WEAR COTTON!
Tuesday, December 11, 2012
Choosing Snowshoes
Before you buy, there are a few things you should know. Unlike the sport of skiing, there is nothing technical about snowshoe gear. You don't need high end clothes, or special boots. Although insulated, high winter boots are best, I slip on a pair of heavy wool socks and go. I wear the same snow pants, insulated hooded jacket, gloves, and knit cap that I wear to shovel snow at the house.
If you are new to snowshoeing, think three things: BINDING, SHAPE and FLOAT.
This series is being written for people who will be snowshoeing for recreational outings, day trips and weekend jaunts with their family.
BINDINGS:
Are normally made of plastic or rubber and are secured to the frame with gromets or rivits. Bindings should be sturdy and durable. The mechanism that secures your boots to your snowshoes should be easy to lock, adjust, and release. You should be able to slip boots in and out of the binding with ease. Most important, you should be able to secure, adjust and release bindings with gloves on in the cold.
SHAPE:
Snowshoes today are designed in either a rouund or tapered configuration. Round shoes are wider providing you better float. The down side is they can cause the wearer to scrape or catch one shoe on the other as you walk. Tapered models can be easier to walk in but have less float.
FLOAT (factor):
Is what keeps you from sinking into that fresh white powder you will be walking on.
Recommendations:
- Visit a local outdoor gear store and talk to one of their experts.
- Dress in the clothes you plan on wearing (or take them with you to dress at the store), including socks, boots, gloves, headgear, and goggles (you must be able to bend down with pack on to adjust/remove your snowshoes in the cold).
- Load your day pack with the essentials (see separate article) you will need. Take it with you to the store (total weight-body plus pack-will determine the size snowshoe best suited for you).
- Take poles or ask for a pair at the gear store (so you can test your ability to walk with snowshoes on, while using poles for balance).
- Try on different brands of snowshoes (Atlas, Red Feather, Crescent Moon, MSR, Tubbs) before making your choice.
- Ask questions and be totally satisfied before you leve the store.
- Inquire about the store return policy.
- How to dress for Snowshoeing
- Saftey and First Aid
- Daypack essentials
- My favorite snowshoe trails (see the home page at far right)
Wednesday, December 5, 2012
Update to 'Hiker Profile'
The hiker updated his blog profile. Check it out on the home page by clicking on "About the Hiker" on the far right below the banner.
Monday, December 3, 2012
Snowshoeing, a Great Workout, and Great Fun
If you have ever hiked any distance, snowshoeing is no different except you have a a pair of tennis rackets strapped to your boots. This is one sport that virtually every person who tries it will love, first time.
You could say that snowshoeing is hiking on snow-covered trails. The nice thing is that you have specially designed gear to help distribute your weight across a much larger area than your boots, thus keeping you atop the snow.
Kids do it. Couples do it. Retirees do it too. Like hiking the Colorado back country all Summer, snowshoes allow you to do it on many of the same trails, in winter. There is no way to explain how different and beautiful the trail you hiked in July is compared to winter, except to go out and do it.
Take it from a person who relishes his solitude, and I do have my favorite spots. In winter, that same spot you sat on to watch a marmot scamper across a pile of scree can provide an entirely different level of solitude. No planes overhead, no birds, no chattering squirrels..get the picture.
Start with this list of clothing and gear.
Clothes
State and national parks designate certain trails as snowshoe trails. They will be marked as such. If you have your own snowshoes or borrow them, start at a local community park or open space you are familiar with. Don't over do it the first time. If your first experience is a good one, you will want to do it again.
More to come on the sport, including favorite trails, where to find gear, how to dress, tips on safety, and much more. Check this blog for these and other related topics.
You could say that snowshoeing is hiking on snow-covered trails. The nice thing is that you have specially designed gear to help distribute your weight across a much larger area than your boots, thus keeping you atop the snow.
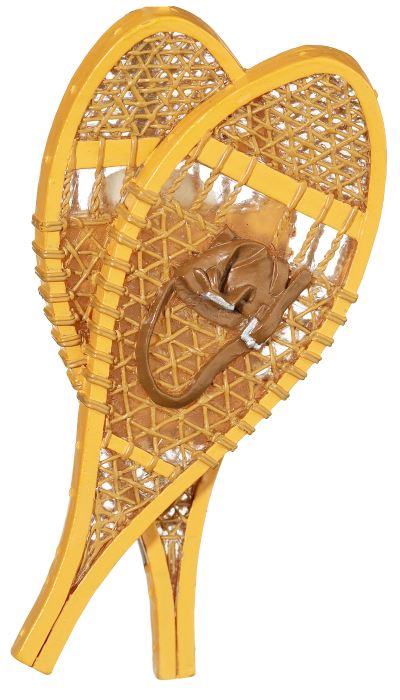 |
| Early snowshoes were made of wood. Decking was a sort of woven tapestry. Bindings were a combination of metal and leather. |
Kids do it. Couples do it. Retirees do it too. Like hiking the Colorado back country all Summer, snowshoes allow you to do it on many of the same trails, in winter. There is no way to explain how different and beautiful the trail you hiked in July is compared to winter, except to go out and do it.
 |
| Modern snowshoes are light, easy to put on and take off with gloves on. |
Take it from a person who relishes his solitude, and I do have my favorite spots. In winter, that same spot you sat on to watch a marmot scamper across a pile of scree can provide an entirely different level of solitude. No planes overhead, no birds, no chattering squirrels..get the picture.
Start with this list of clothing and gear.
Clothes
- Layering of clothes; thermal top and bottom undies, breathable LS shirt or fleeece jacket, waterproof jacket or shell and snowpants
- Waterproof gloves
- Ski Cap
- Wool or synthetic-blend socks (no cotton)
- Waterproof boots
- Gaiters
- Snowshoes (borrow or rent first few times)
- Poles (snow baskets can be affixed to most hiking poles)
- Polarized sunglasses or goggles
- Camelbak
- Daypack with extra socks, sunscreen, fa kit, camera and snacks
 |
| A group on snowshoes enjoys the back country in winter. |
State and national parks designate certain trails as snowshoe trails. They will be marked as such. If you have your own snowshoes or borrow them, start at a local community park or open space you are familiar with. Don't over do it the first time. If your first experience is a good one, you will want to do it again.
More to come on the sport, including favorite trails, where to find gear, how to dress, tips on safety, and much more. Check this blog for these and other related topics.
Subscribe to:
Posts (Atom)